No edit summary Tag: 2017 source edit |
No edit summary |
||
| Line 18: | Line 18: | ||
'''Unpack''' the ZIP archive that you have just downloaded in a Archiv in a suited system path of your hard drive. | '''Unpack''' the ZIP archive that you have just downloaded in a Archiv in a suited system path of your hard drive. | ||
{{Hint|file=hint.png|text=This documentation assumes the | {{Hint|file=hint.png|text=This documentation assumes the [[Setup:Installation Guide/Advanced/Windows Folder Structure|folder structure recommended by us]]. For this reason, Elasticsearch is unpacked at this point in the folder C:\bluespice\bin\elasticsearch-6.8.23. If you have individual wishes, adjust these paths according to your own understanding.}} | ||
==Installing the plugin ingest-attachment== | ==Installing the plugin ingest-attachment== | ||
Revision as of 17:53, 11 March 2022
| To run Elasticsearch, OpenJDK is required. If you have not installed it, install it now. |
Download
BlueSpice ist derzeit mit Elasticsearch 6.x ab Version 6.8.21 kompatibel. Elasticsearch > 6.8.x wird derzeit nicht unterstützt.
Die jeweils aktuelle Version können Sie dieser Liste entnehmen. Daraus ergibt sich folgender direkter Download-Link: https://artifacts.elastic.co/downloads/elasticsearch/elasticsearch-<Versionsnummer>.zip also bspw. https://artifacts.elastic.co/downloads/elasticsearch/elasticsearch-6.8.23.zip.
Folgen Sie dabei den Download-Anweisungen Ihres Browsers.
Unpacking the ZIP archive
Unpack the ZIP archive that you have just downloaded in a Archiv in a suited system path of your hard drive.
| This documentation assumes the folder structure recommended by us. For this reason, Elasticsearch is unpacked at this point in the folder C:\bluespice\bin\elasticsearch-6.8.23. If you have individual wishes, adjust these paths according to your own understanding. |
Installing the plugin ingest-attachment
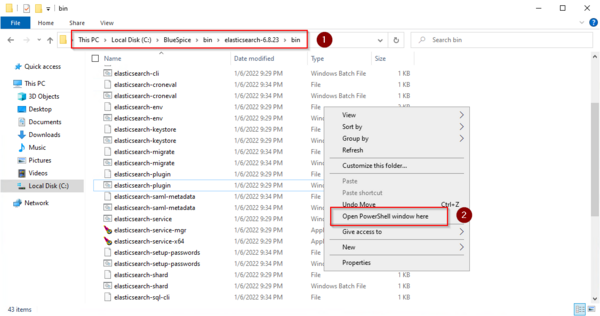
Change to the directory "C:\bluespice\bin\elasticsearch-6.8.23\bin" (1).
Right-click on a free area of the Explorer window with the Shift-key pressed.
Click "Open PowerShell window here" (2):
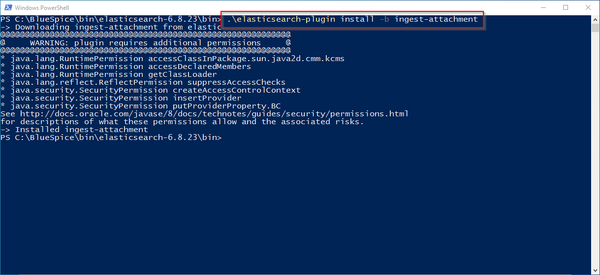
Execute the command ". \elasticsearch-plugin.bat install -b ingest-attachment":
| If your server does not have an active internet connection, then download the plug-in ingest-attachment as zip archive and install it, as documented directly by the manufacturer. |
Installing the Elasticsearch service
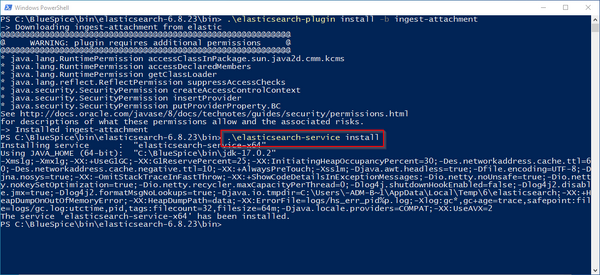
Run the "elasticsearch-service.bat install" command and wait for the process to complete:
Configuring and starting the Elasticsearch service
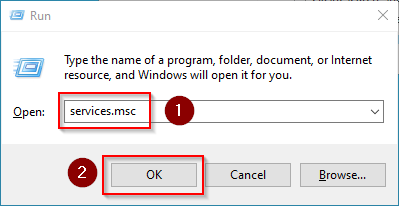
Press the key combination Windows+R.
Enter "services.msc" (1) in the dialog window and click "OK" (2):
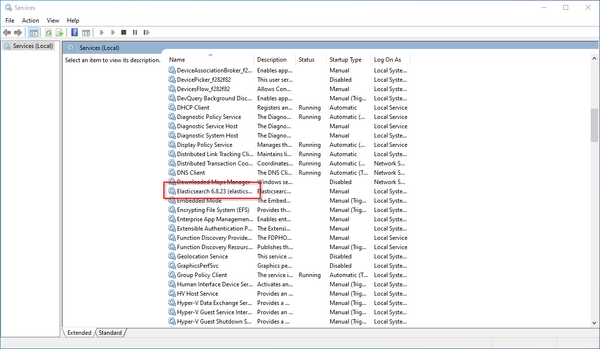
Search for the service "Elasticsearch 6.8.23" and open it with a double-click:
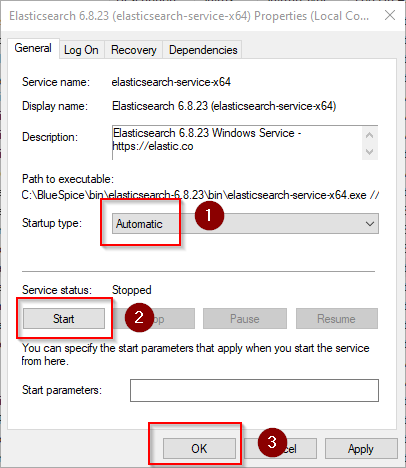
Select the startup type "Automatic" (1) and start the service (2).
Click "OK" (3) to close the window after the service is started:
Next step
If you have successfully completed all of the above steps, proceed to the next step: Python.

