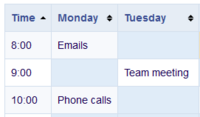
No edit summary |
No edit summary |
||
| Line 16: | Line 16: | ||
To merge a row or column, select the cells in a row or in a column. The inspector will show a "Merge" button. Click it to merge the cells. The same button is called "Unmerge" if you want to separate connected cells. | To merge a row or column, select the cells in a row or in a column. The inspector will show a "Merge" button. Click it to merge the cells. The same button is called "Unmerge" if you want to separate connected cells. | ||
[[File:table_3.0.png|alt=Table with all cells in a table row selected and the merge button|center|thumb|350x350px|Merging cells]] | [[File:table_3.0.png|alt=Table with all cells in a table row selected and the merge button|center|thumb|350x350px|Merging cells]] | ||
<br /> | <br /> | ||
| Line 87: | Line 86: | ||
<span><br /></span> | <span><br /></span> | ||
<section begin="training-tabellen" /> | <section begin="training-tabellen" /> | ||
=== Sticky header === | |||
It is possible to add the css-class ''mw-sticky-header'' in source edit mode to achieve a table header that stays visible during page scrolling. It works with all table styles. | |||
The below example sets a sticky header for the default table style ''wikitable'':<syntaxhighlight lang="text"> | |||
{| class="wikitable mw-sticky-header" | |||
</syntaxhighlight><div class="training anwender"> | |||
== Using existing tables == | |||
* Tables can also be inserted as a csv file on a page (just drag the CSV file onto the page in edit mode) | * Tables can also be inserted as a csv file on a page (just drag the CSV file onto the page in edit mode) | ||
* Complex tables can alternatively be attached to the page as an xlsx file. | * Complex tables can alternatively be attached to the page as an xlsx file. | ||
Revision as of 15:14, 1 July 2024
Insert a table
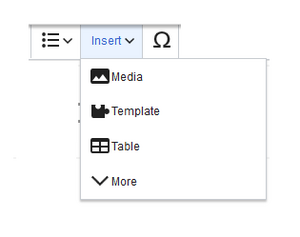
In VisualEditor, choose "Insert > Tables" to insert a table in a page:
After entering the rows and columns, an empty table appears with the edit menu:
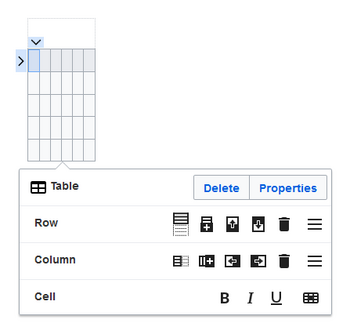
When the mouse rests on a symbol, the respective function is displayed.
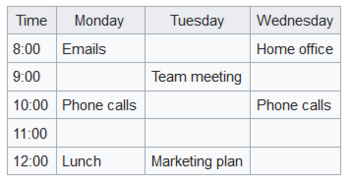
Double-click in the cells to insert text:
Merge rows and columns
To merge a row or column, select the cells in a row or in a column. The inspector will show a "Merge" button. Click it to merge the cells. The same button is called "Unmerge" if you want to separate connected cells.
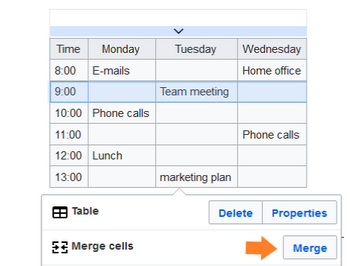
Table properties
In the menu item Properties, there are numerous settings to adjust the functionality and presentation of the table:
Table styles
The following style sheets can be selected in the Table Style menu. Click on a picture to start the gallery:
-
No table style
-
Standard
-
Content
-
Content (black)
-
Content (blue)
-
Content (darkblue)
-
Cusco Sky
-
Casablanca
-
Greyscale
-
Greyscale (narrow)
Sticky header
It is possible to add the css-class mw-sticky-header in source edit mode to achieve a table header that stays visible during page scrolling. It works with all table styles.
The below example sets a sticky header for the default table style wikitable:{| class="wikitable mw-sticky-header"
Using existing tables
- Tables can also be inserted as a csv file on a page (just drag the CSV file onto the page in edit mode)
- Complex tables can alternatively be attached to the page as an xlsx file.
Related info

