(Created page with "<nowiki><div class="downloadarea"></nowiki> <nowiki><span class="getButton">Download</nowiki><nowiki></span></nowiki> <nowiki>File:HW...") |
No edit summary Tag: 2017 source edit |
||
| Line 1: | Line 1: | ||
< | <div class="downloadarea"> | ||
<span class="getButton">[[Media:HW-LanguageSwitcher-en.zip|Download]]</span> | |||
[[File:HW-languageswitcher.png|350x350px|alt=language switcher screenshot]] | |||
</div>This template creates a language switcher that supports English, German and French language pages. It can be inserted into a wiki page via the VisualEditor ''Insert > Template'' menu. | |||
==Importing the template== | |||
(The download file here only works in a wiki that is set to the content language English. For downloading the file for a wiki with content language set to German, go to the German Helpdesk.) | |||
The import file is included in the archive file ''HW-LanguageSwitcher-en.zip''. Unpack the zip file first. | |||
On the page ''Special:Import'' follow these steps: | |||
#'''Select file''' and choose ''HW-LanguageSwitcher-en.xml''. | |||
#'''Enter''' an Interwiki prefix. Since this field is required, simply add ''hw'' (for hallowelt). | |||
#'''Keep''' the selection ''Import to default locations''. | |||
#'''Click''' ''Upload file...'' . | |||
The template is now available in your wiki. | |||
==Pages included in the import== | |||
The xml import creates the following files in your wiki: | The xml import creates the following files in your wiki: | ||
* Template:Languages | |||
* Template:Languages/styles.css | |||
==Using the template== | |||
For the language switcher to work, you need to create the language versions of a page as the English pages subpages, e.g.: | |||
* Vacation policy | |||
* Vacation policy/de | |||
* Vacation policy/fr | |||
The template is added to each language version. | |||
# Add the template ''Languages'' from the [[Manual:Extension/VisualEditor|VisualEditor]] insert-dialog. | |||
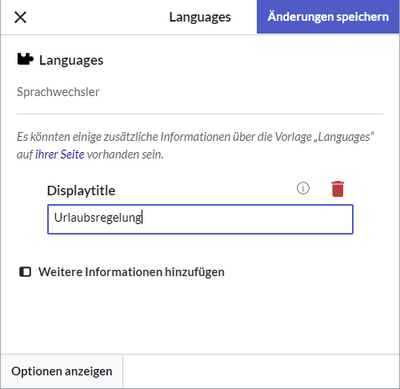
# Provide a display title if the page is a subpage. For example for the Vacation policy/de, enter "Urlaubsregelung":[[File:HW-languageswitcher-templatedata.png|alt=Setting a display title|center|thumb|400x400px|Setting a display title]] | |||
__NOTOC__ | |||
Revision as of 18:14, 10 February 2022
This template creates a language switcher that supports English, German and French language pages. It can be inserted into a wiki page via the VisualEditor Insert > Template menu.
Importing the template
(The download file here only works in a wiki that is set to the content language English. For downloading the file for a wiki with content language set to German, go to the German Helpdesk.)
The import file is included in the archive file HW-LanguageSwitcher-en.zip. Unpack the zip file first.
On the page Special:Import follow these steps:
- Select file and choose HW-LanguageSwitcher-en.xml.
- Enter an Interwiki prefix. Since this field is required, simply add hw (for hallowelt).
- Keep the selection Import to default locations.
- Click Upload file... .
The template is now available in your wiki.
Pages included in the import
The xml import creates the following files in your wiki:
- Template:Languages
- Template:Languages/styles.css
Using the template
For the language switcher to work, you need to create the language versions of a page as the English pages subpages, e.g.:
- Vacation policy
- Vacation policy/de
- Vacation policy/fr
The template is added to each language version.
- Add the template Languages from the VisualEditor insert-dialog.
- Provide a display title if the page is a subpage. For example for the Vacation policy/de, enter "Urlaubsregelung":


Discussions