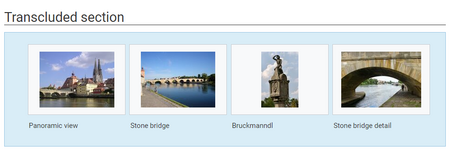
Created page with "<div class="downloadarea"> <span class="getButton">Download</span> 450x450px </div>This template creates a page..." Tag: 2017 source edit |
No edit summary |
||
| (2 intermediate revisions by the same user not shown) | |||
| Line 1: | Line 1: | ||
<div class="downloadarea"> | <div class="downloadarea"> | ||
<span class="getButton">[[Media:HW- | <span class="getButton">[[Media:HW-sectiontransclusion.zip|Download]]</span> | ||
[[File:HW-transclusion.png|450x450px]] | [[File:HW-transclusion.png|450x450px]] | ||
</div>This template | </div>This template allows to include a section from a wiki page on another page. It can be styled as a colored box. | ||
==Importing the template== | |||
== Importing the template == | |||
The import file is included in the archive file ''HW-transclusion-en.zip''. Unpack the zip file first. | The import file is included in the archive file ''HW-transclusion-en.zip''. Unpack the zip file first. | ||
On the page ''Special:Import'' follow these steps: | On the page ''Special:Import'' follow these steps: | ||
#'''Select file''' and choose ''HW- | #'''Select file''' and choose ''HW-sectiontransclusion.xml''. | ||
#'''Enter''' an Interwiki prefix. Since this field is required, simply add ''hw'' (for hallowelt). | #'''Enter''' an Interwiki prefix. Since this field is required, simply add ''hw'' (for hallowelt). | ||
#'''Keep''' the selection ''Import to default locations''. | #'''Keep''' the selection ''Import to default locations''. | ||
| Line 24: | Line 25: | ||
==Using the template== | ==Using the template== | ||
#Add the template from the [[Manual:VisualEditor|VisualEditor]] insert-dialog. | #Add the template from the [[Manual:Extension/VisualEditor|VisualEditor]] insert-dialog. | ||
#Fill in the form fields as needed. | #Fill in the form fields as needed. | ||
{{Messagebox|boxtype=note|Note text=If, after importin the template to your wiki, the input fields are not displayed when you first integrate it into a wiki page, you need to open the template in the template namespace, make a change (e.g. insert spaces) and save the template. The input fields should now be displayed correctly.}} | {{Messagebox|boxtype=note|Note text=If, after importin the template to your wiki, the input fields are not displayed when you first integrate it into a wiki page, you need to open the template in the template namespace, make a change (e.g. insert spaces) and save the template. The input fields should now be displayed correctly.}} | ||
| Line 30: | Line 31: | ||
[[File:HW-transclusion-templatedata-en.png|alt=Input fields for transclusion|center|thumb|400x400px|Input fields for transclusion]] | [[File:HW-transclusion-templatedata-en.png|alt=Input fields for transclusion|center|thumb|400x400px|Input fields for transclusion]] | ||
<br /> | <br /> | ||
Latest revision as of 11:14, 5 February 2024
This template allows to include a section from a wiki page on another page. It can be styled as a colored box.
Importing the template
The import file is included in the archive file HW-transclusion-en.zip. Unpack the zip file first.
On the page Special:Import follow these steps:
- Select file and choose HW-sectiontransclusion.xml.
- Enter an Interwiki prefix. Since this field is required, simply add hw (for hallowelt).
- Keep the selection Import to default locations.
- Click Upload file... .
The template is now available in your wiki.
Pages included in the import
The xml import creates the following files in your wiki:
- Template:Transclusion
- Template:Transclusion/styles.css
Using the template
- Add the template from the VisualEditor insert-dialog.
- Fill in the form fields as needed.
| Input field | Description |
|---|---|
| Page to transclude into this document | Page name of the page containing the section (including the namespace prefix if the page is not in the main namespace). |
| Page section | Heading of the section you want to transclude. If a section contains sub-headings, these are included up to the next heading at the same level of the section. |
| Color style | If you want to apply a background color, you can select one here. Choices are: blue, green, grey, red, yellow |
| Background | If you don't like any of the color styles, you can enter your own color in hex format (e.g. # cce6ff). |
| Border | Creates a border color. Apply only when you use a custom background color instead of the color style (which already uses its own border color). |
| Padding | Distance from box to box content. Default value: 20px. You can set this to any other pixel-value or simple enter 0 for now padding. |
