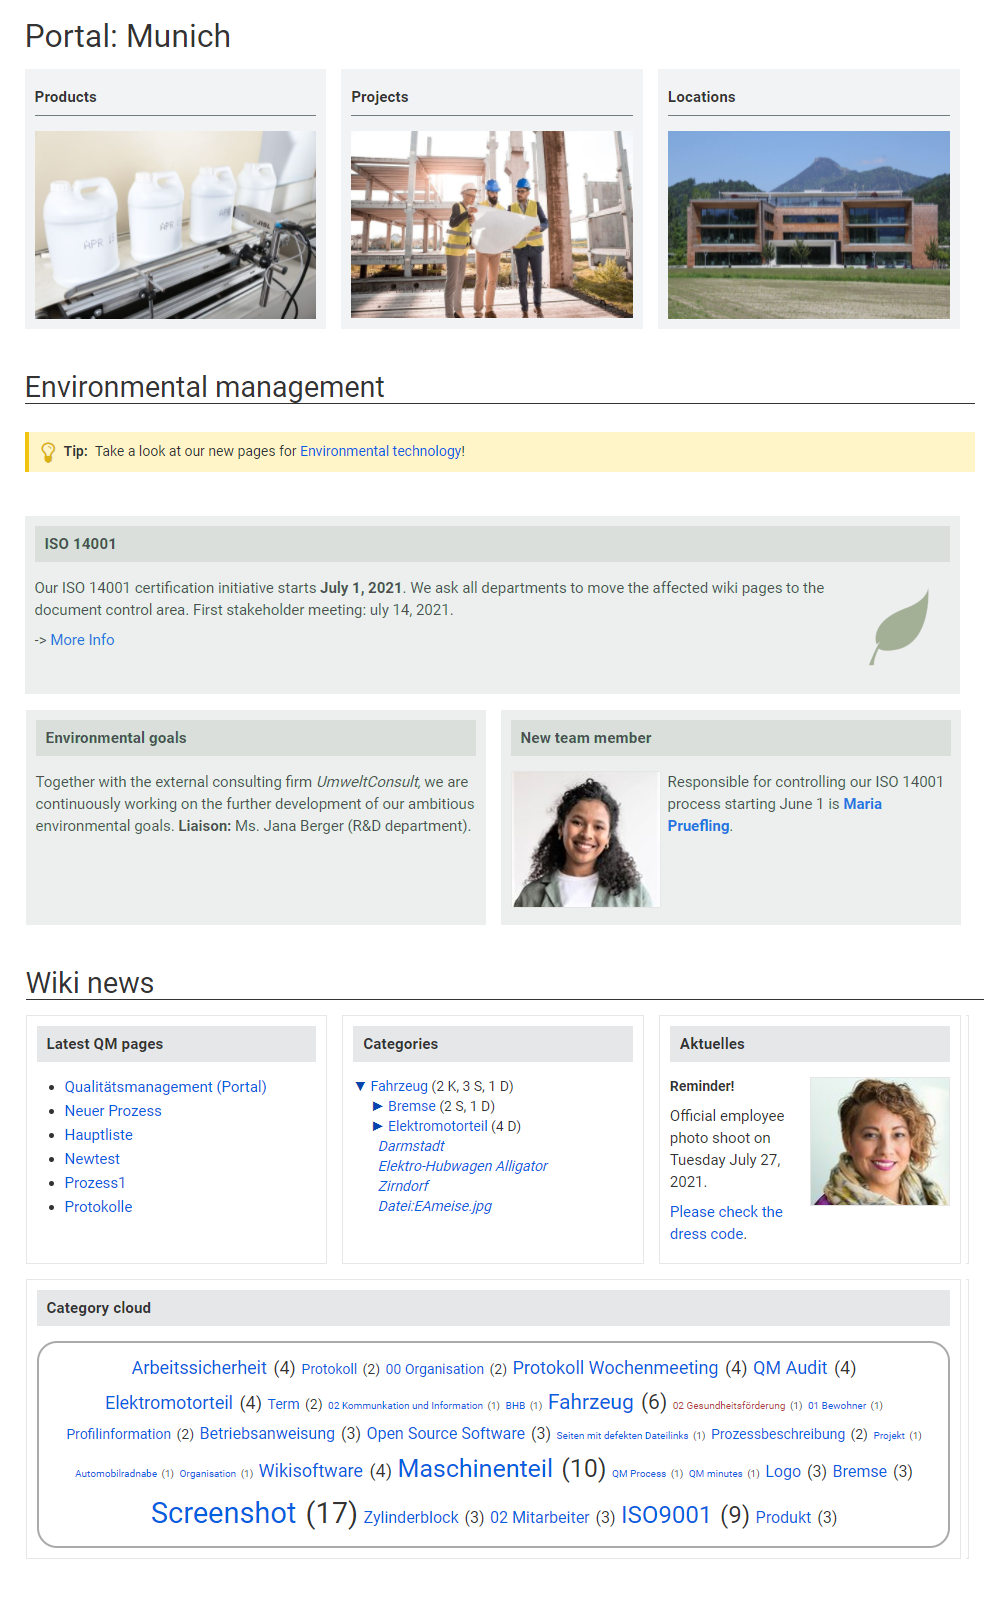
The template Portal flex allows you to create pages based on a 2 or 3 column layout. In addition, each page can contain an intro section.
Individual pages that were created using this Portal flex template can be combined into one portal page using transclusion. (as shown in the example image on this page).
The layout is responsive and shown optimized for different devices.
Importing the template
The import file is included in the archive file HW-PortalFlex.zip. Unpack the zip file first.
On the page Special:Import follow these steps:
- Select file and choose HW-PortalFlex-en.xml.
- Enter an Interwiki prefix. Since this field is required, simply add hw (for hallowelt).
- Keep the selection Import to default locations.
- Click Upload file... .
The form-based template is now available in your wiki.
Creating portal pages
To create a portal page:
- Add the page Template:Portal flex PT as a page template to your wiki.
- Go to the template manager at Special:PageTemplatesAdmin.
- Click the "+" button to add the template as a new page template for the entire wiki:
- Template name: Portal page
- Description: Generic portal page
- Namespace: (all)
- Template:Template:Portal flex PT
- Create a new wiki page. You should now have the template Portal page available for selection.
- Save the new page.
- To edit the form settings or to add simple text or graphics, click "...all actions" in the page tools and then click Edit with form. After changing the settings as needed, save the page. If you want to add dynamic content such as SMW-queries, you need to click "Edit source" instead of "Edit with form".
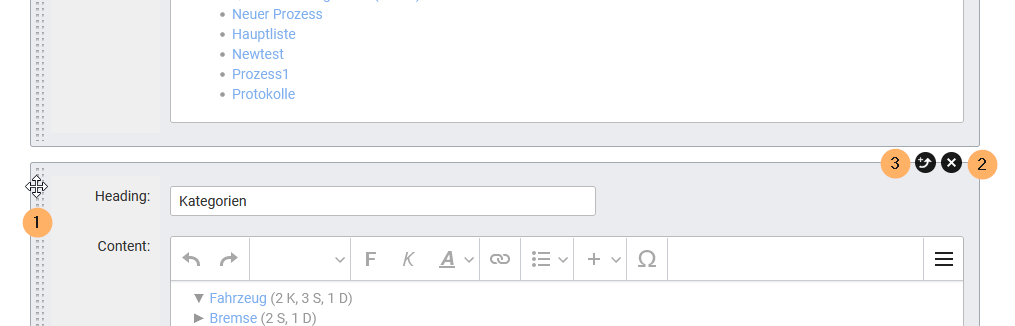
- Create new boxes in forms edit mode by clicking New box and add your content. You can move the boxes up or down in order once you have multiple boxes. You can also override the default background color for an individual box. For example, if you selected white or grey for the default color of your boxes, you can emphasize an individual box by giving it a blue or red background color. You can also hide the heading of an individual box.
- Choose, if necessary, the number of placeholders (1). If, for example, you have chosen a 2-column layout, but you have 3 boxes on the page, then the 3rd box, by default, is shown in full page width. If you select 1 empty placeholder box, then the 3rd box will use only 1/2 of the page width.
- Click Show preview (2). Here you can check your previous settings. Then scroll to the bottom of the page to get back to the form.
- Click Save page when you have finished your edits.


Pages included in the import
The xml import creates the following files in your wiki:
- Template:Portal flex/Start
- Template:Portal flex/Box
- Template:Portal flex/End
- Template:Portal flex/styles.css
- Template:Portal flex PT
- Form:Portal flex
Discussions