No edit summary |
No edit summary |
||
| Line 36: | Line 36: | ||
[[File:Setup:systempreparation_temp_permissions_08.png|border|center|600px|Windows file permissions 08|link=Special:FilePath/Setup:systempreparation_temp_permissions_08.png]] | [[File:Setup:systempreparation_temp_permissions_08.png|border|center|600px|Windows file permissions 08|link=Special:FilePath/Setup:systempreparation_temp_permissions_08.png]] | ||
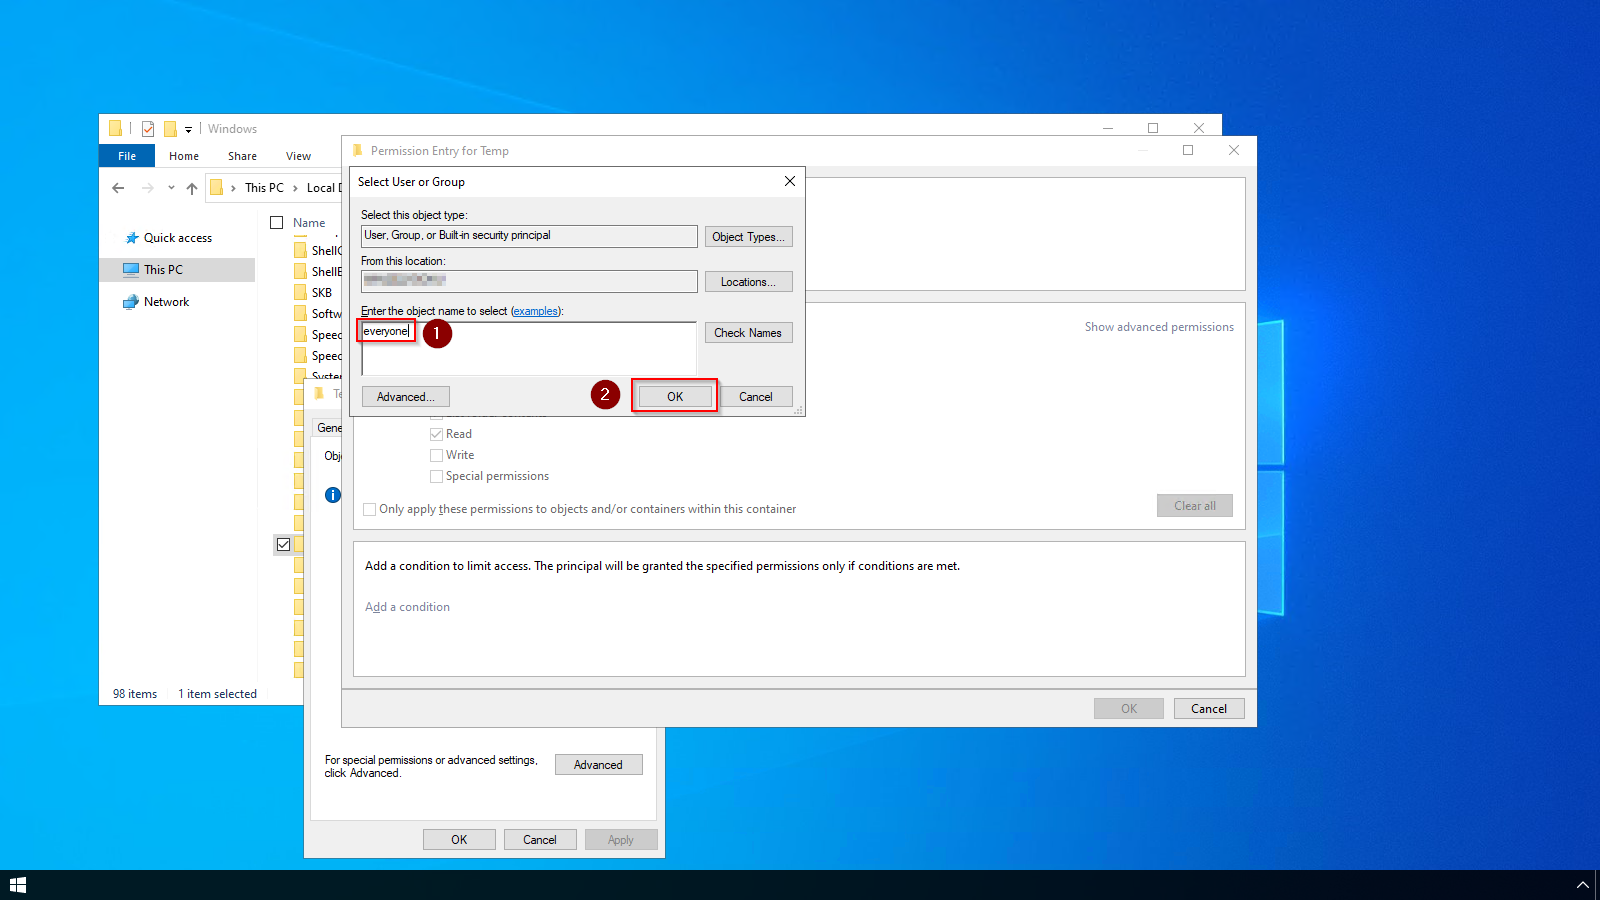
Enter the user name "everyone" in the free-text field (1) of the window "Select User or Group". '''Confirm''' with "OK" (2). | '''Enter''' the user name "everyone" in the free-text field (1) of the window "Select User or Group". '''Confirm''' with "OK" (2). | ||
[[File:Setup:systempreparation_temp_permissions_09.png|border|center|600px|Windows file permissions 09|link=Special:FilePath/Setup:systempreparation_temp_permissions_09.png]] | [[File:Setup:systempreparation_temp_permissions_09.png|border|center|600px|Windows file permissions 09|link=Special:FilePath/Setup:systempreparation_temp_permissions_09.png]] | ||
| Line 42: | Line 42: | ||
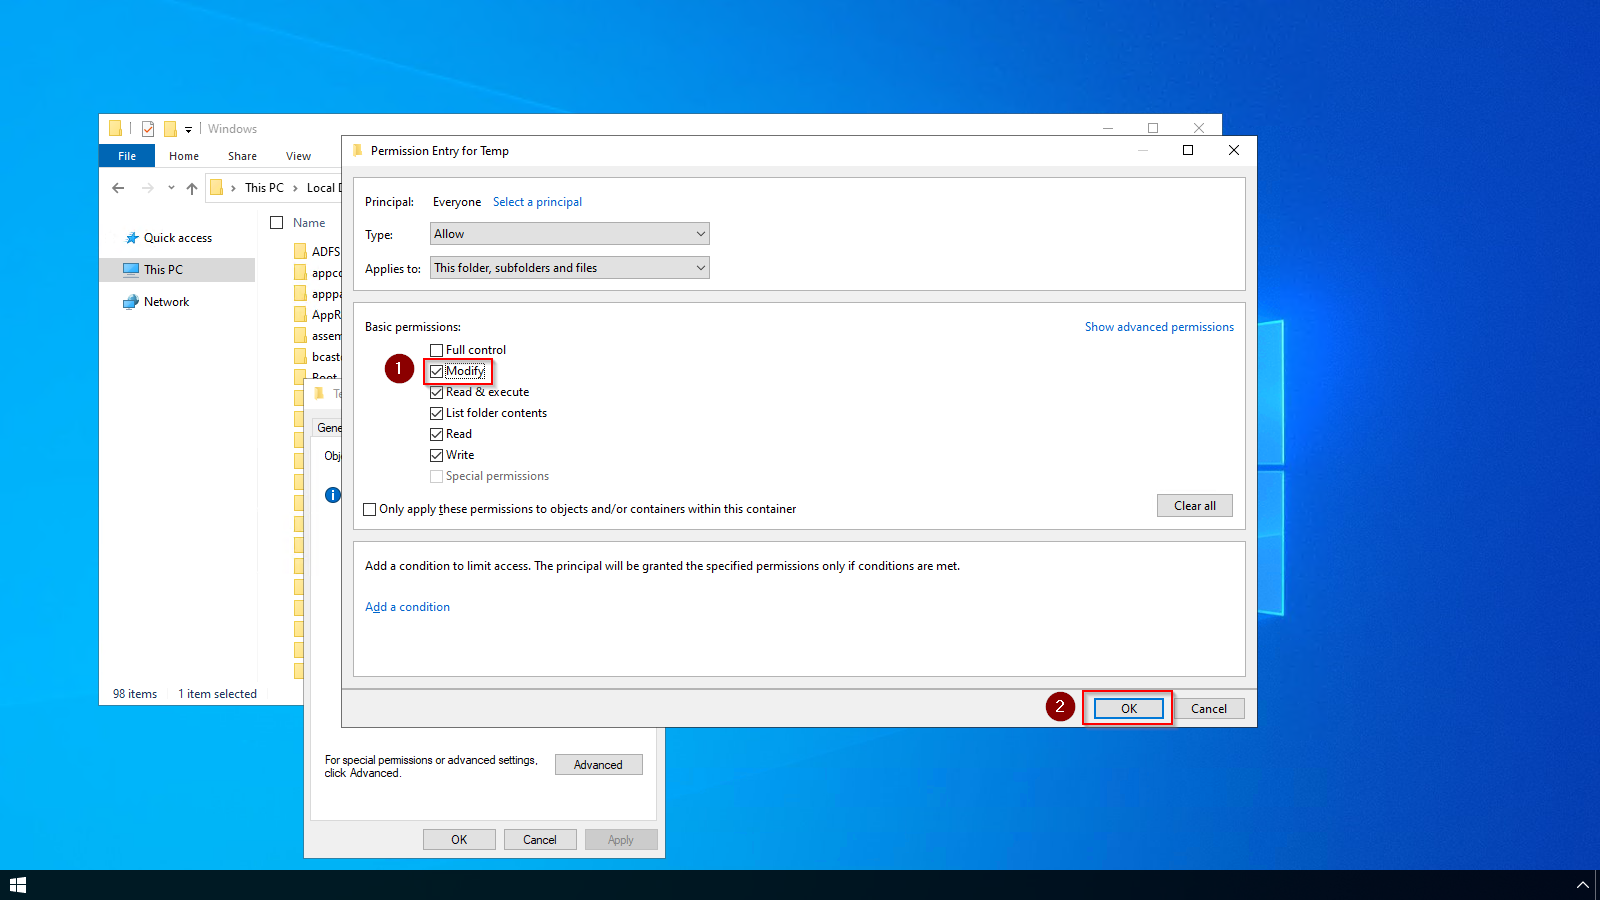
'''Activate''' the "Modify" checkbox (1) for basic permissions in the "Permission Entry for Temp" window and '''click''' "OK". (2):[[File:Setup:systempreparation_temp_permissions_10.png|border|center|600px|Windows file permissions 10|link=Special:FilePath/Setup:systempreparation_temp_permissions_10.png]] | '''Activate''' the "Modify" checkbox (1) for basic permissions in the "Permission Entry for Temp" window and '''click''' "OK". (2):[[File:Setup:systempreparation_temp_permissions_10.png|border|center|600px|Windows file permissions 10|link=Special:FilePath/Setup:systempreparation_temp_permissions_10.png]] | ||
Close all further dialog windows with "OK" or "Yes". The rights for the temporary Windows folder are now set up correctly. | '''Close''' all further dialog windows with "OK" or "Yes". | ||
The rights for the temporary Windows folder are now set up correctly. | |||
==Next step== | ==Next step== | ||
If you have successfully completed all of the above steps, proceed to the next step: [[Setup:Installation_Guide/System_Preparation/Windows/.NET_Framework_3.5|.NET Framework 3.5]]. | If you have successfully completed all of the above steps, proceed to the next step: [[Setup:Installation_Guide/System_Preparation/Windows/.NET_Framework_3.5|.NET Framework 3.5]]. | ||
Latest revision as of 10:56, 9 March 2022
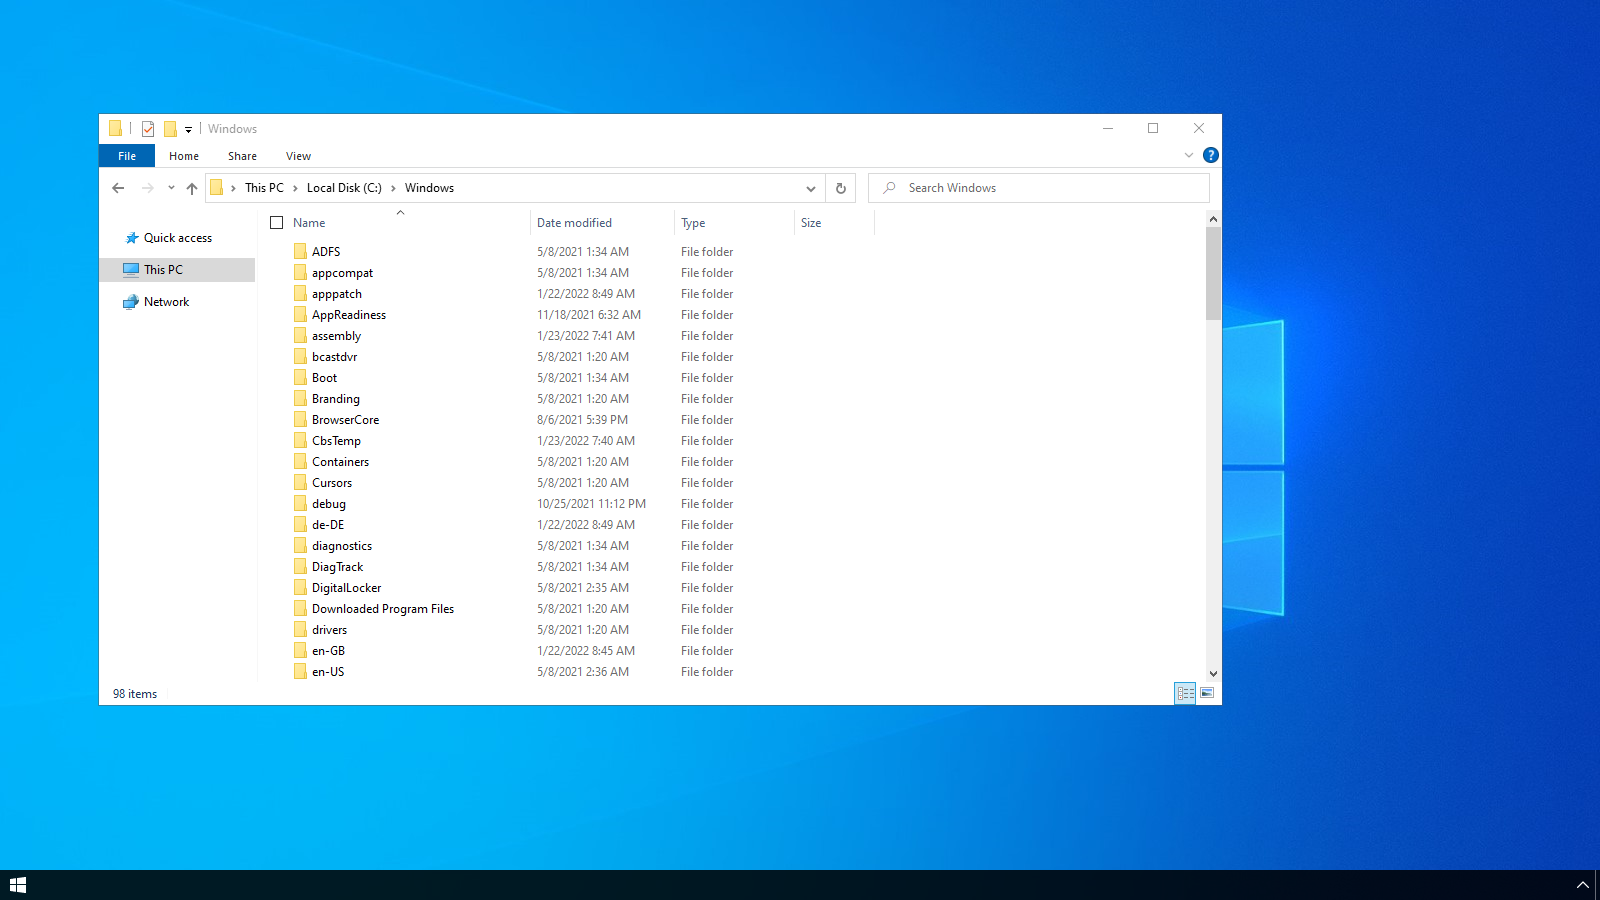
| Various applications require rights to write to the C:\Windows\Temp folder. These are not set as needed by default. In order to be able to carry out all further steps smoothly and also to be able to operate BlueSpice, you must first set these rights. |
Procedure
Open Windows Explorer:
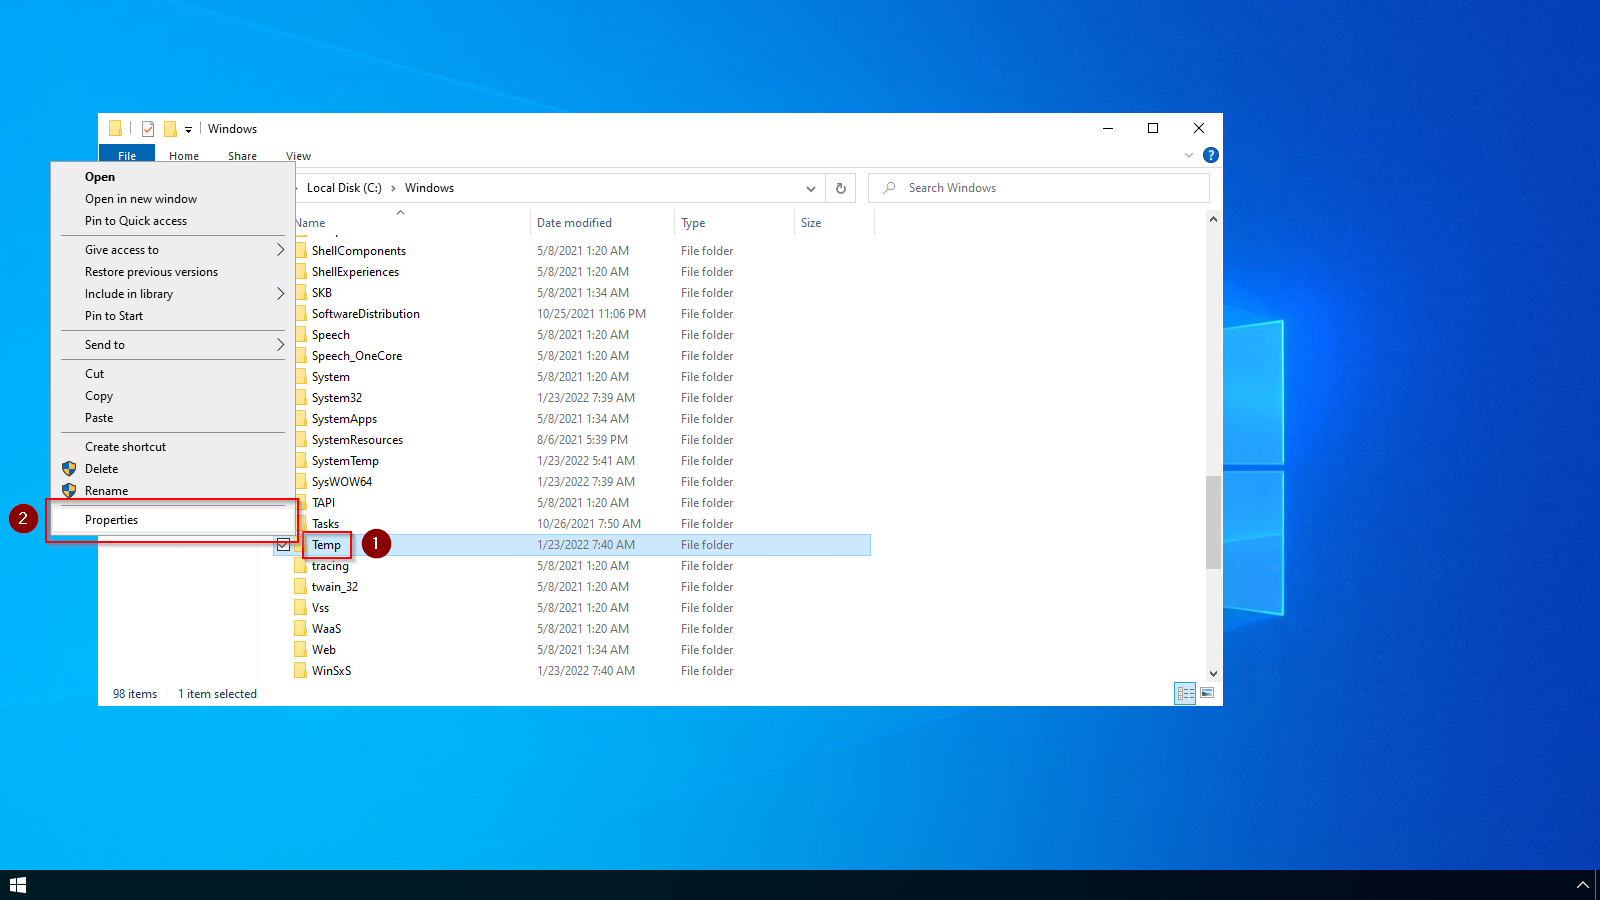
Right-click on the folder "Temp" (1) and open the "Properties" (2):
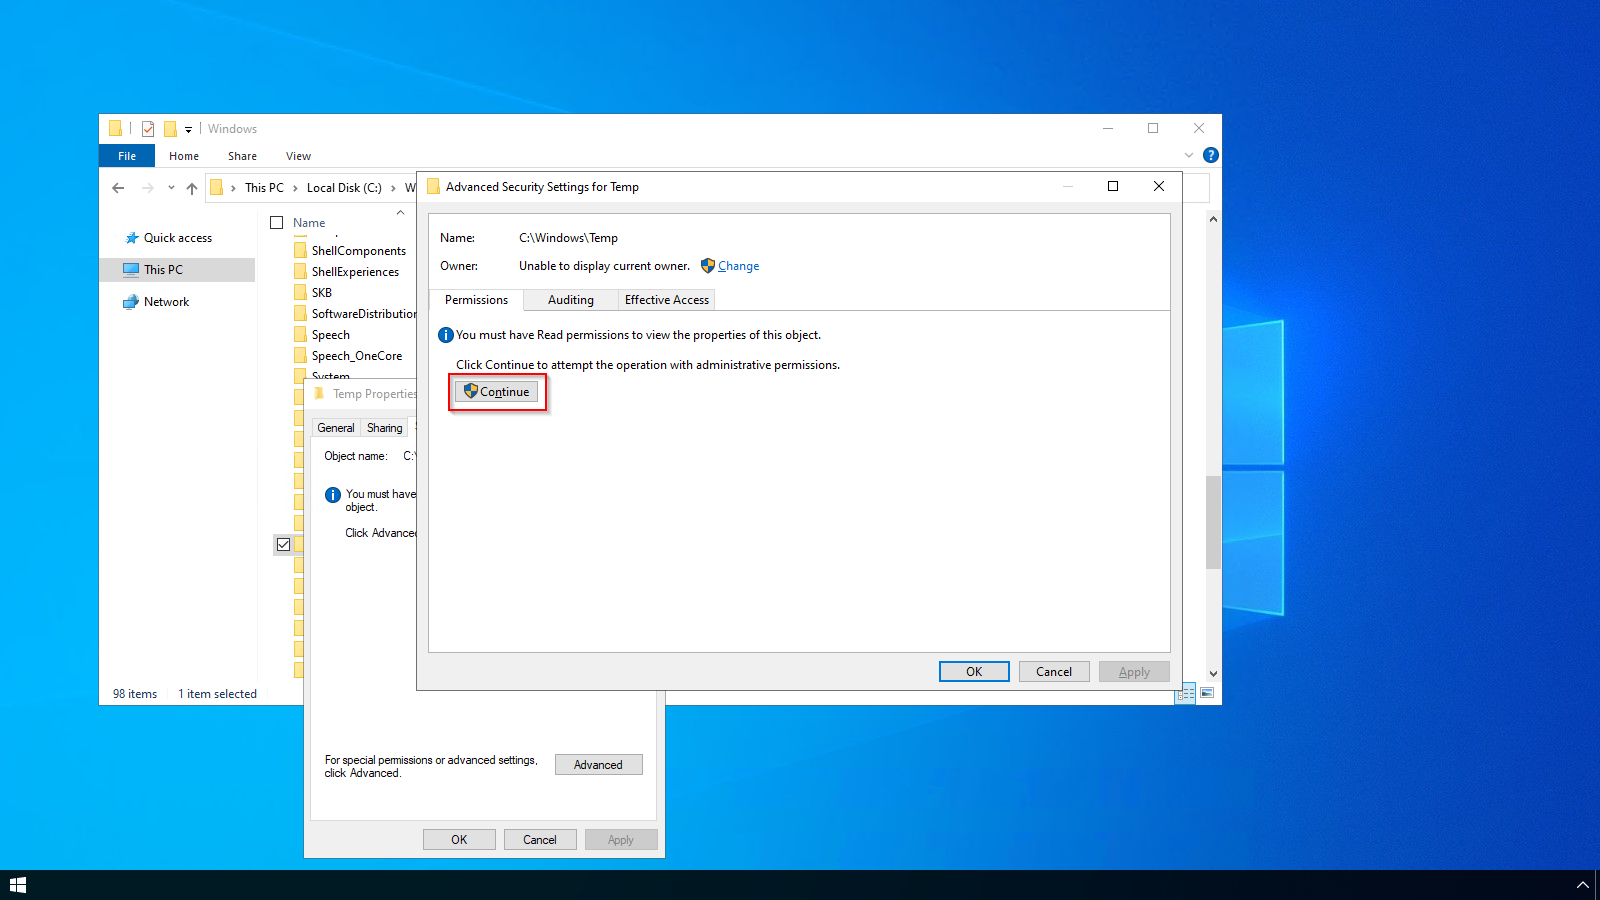
Select the tab "Security" (1) and click "Advanced" (2):

Click "Continue":
Click "Advanced":
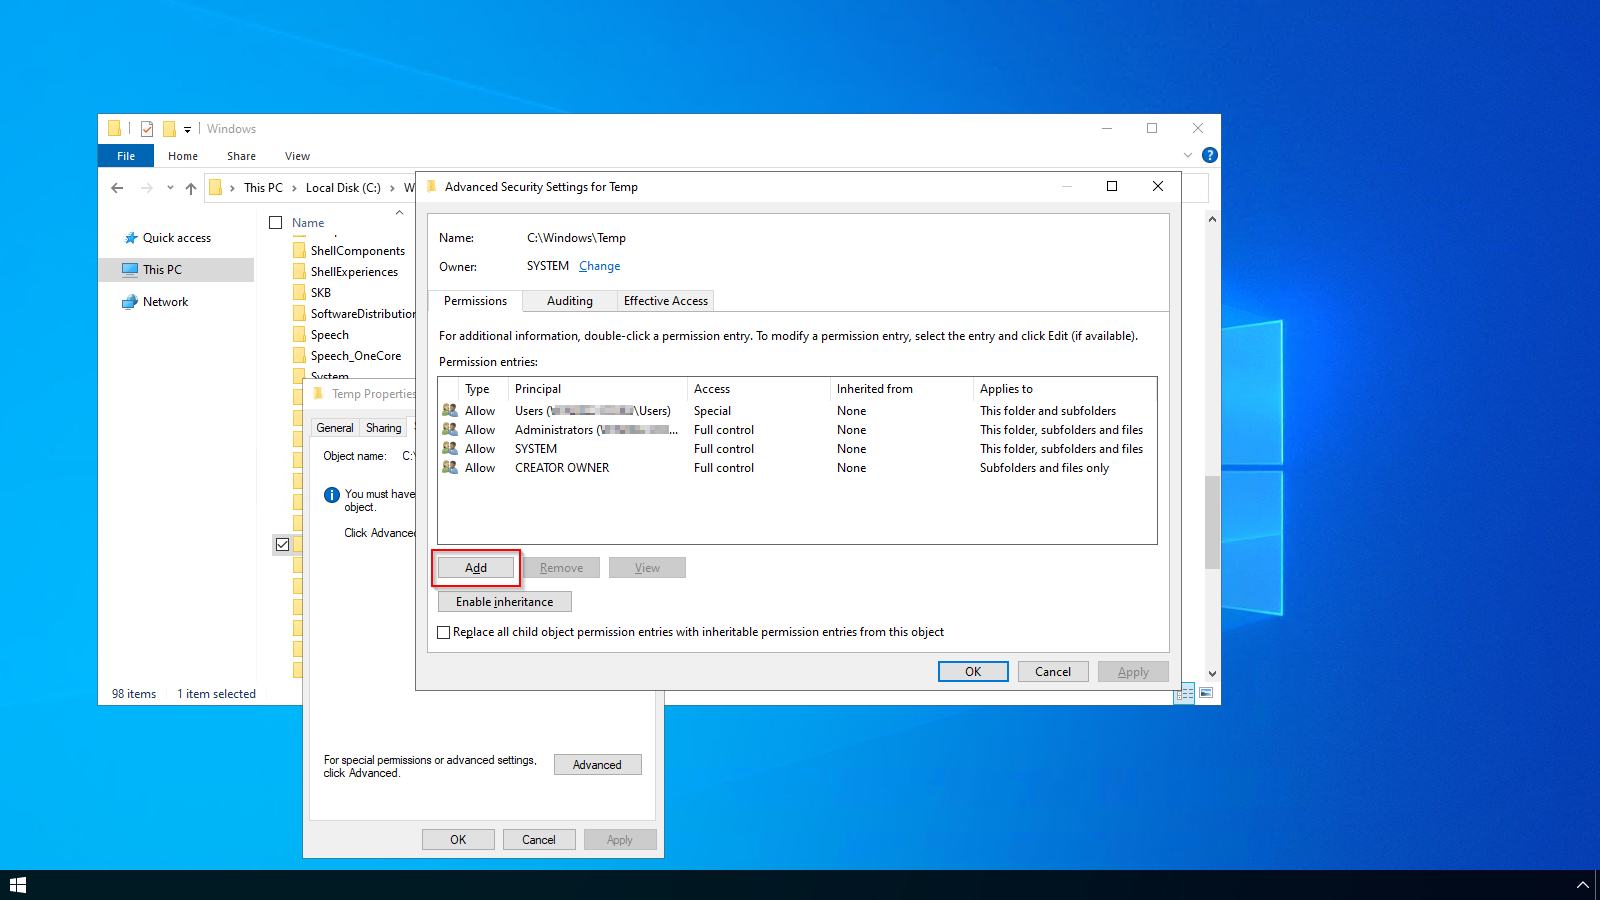
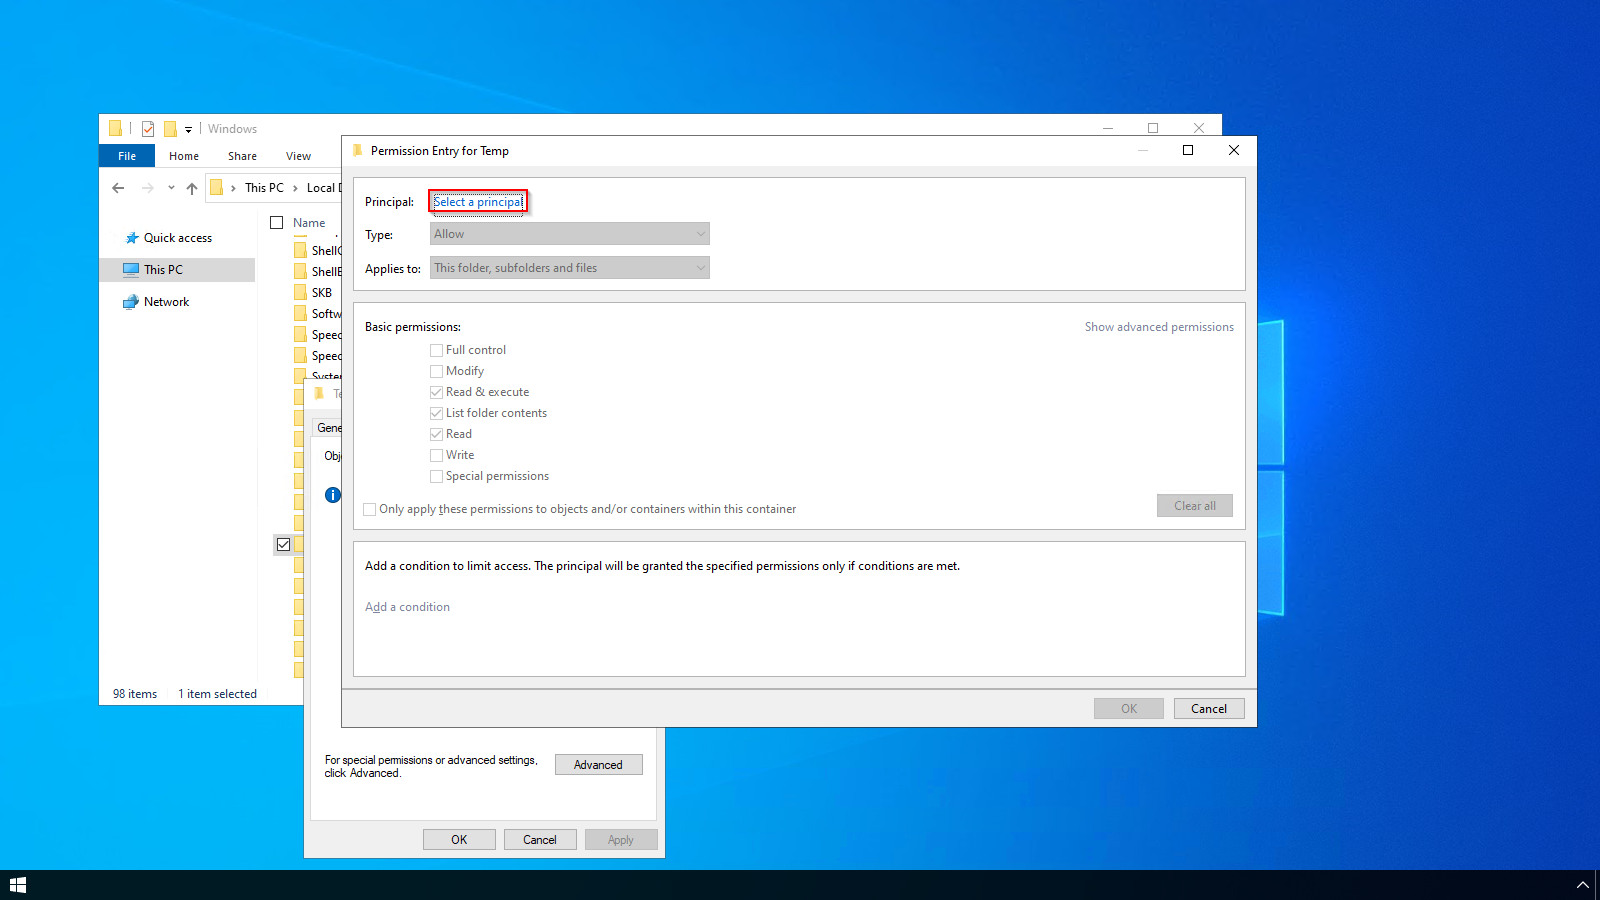
Click "Select a principal":
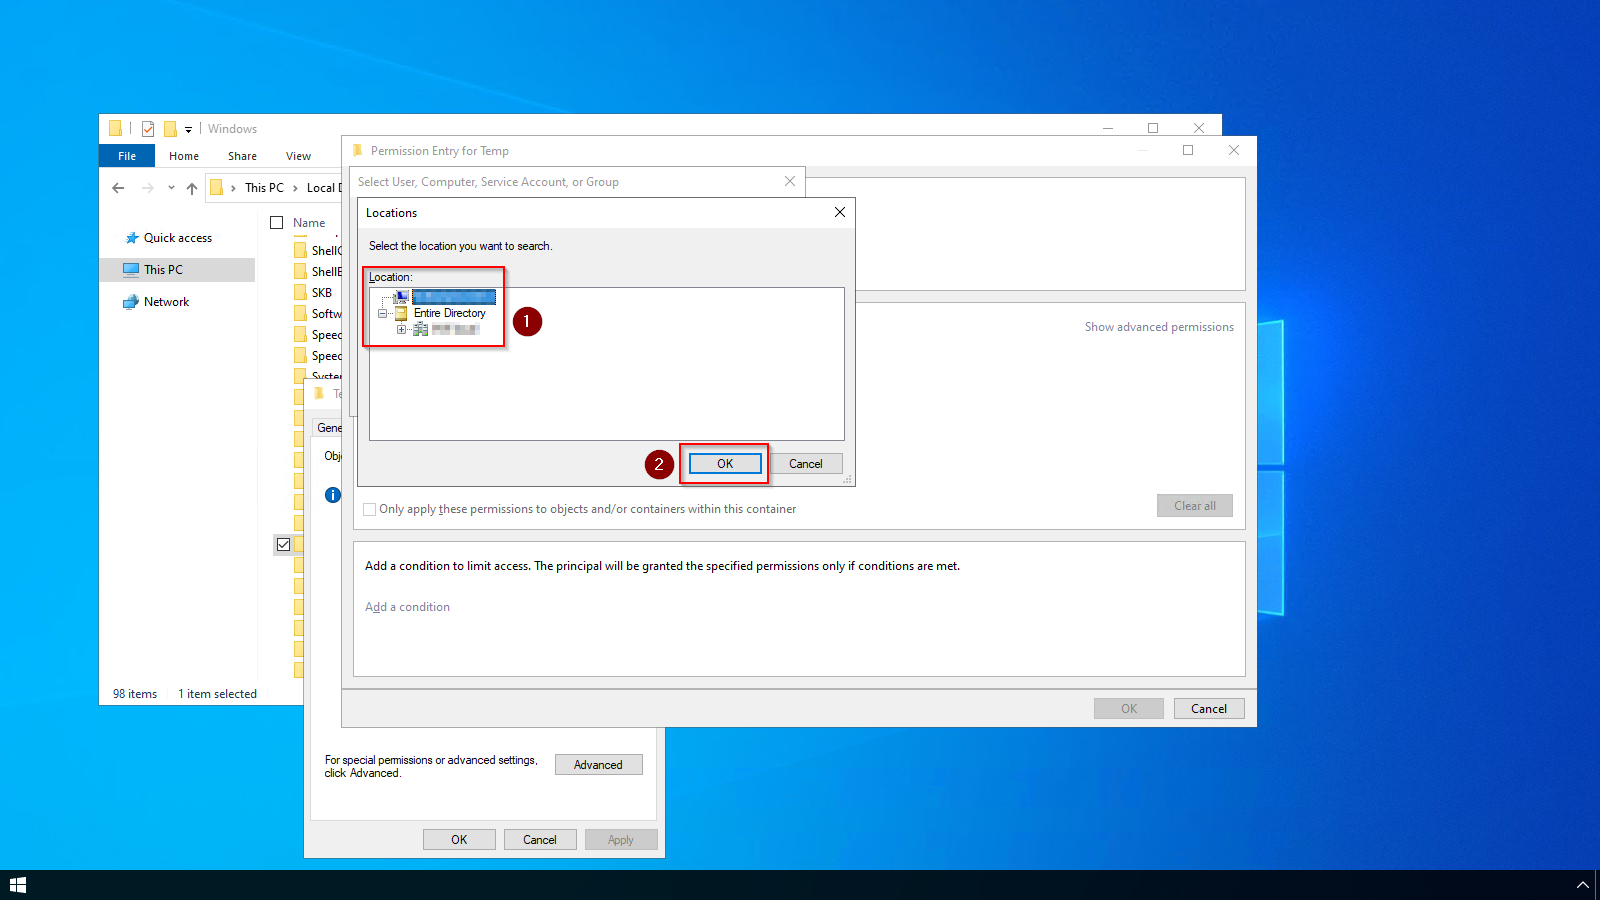
Ensure that your local machine is selected in the field "From this location" (1). If this is not the case, open "Locations..." (2):

Choose the top path in the list (1) and close the dialog window (2):
Enter the user name "everyone" in the free-text field (1) of the window "Select User or Group". Confirm with "OK" (2).
Activate the "Modify" checkbox (1) for basic permissions in the "Permission Entry for Temp" window and click "OK". (2):
Close all further dialog windows with "OK" or "Yes".
The rights for the temporary Windows folder are now set up correctly.
Next step
If you have successfully completed all of the above steps, proceed to the next step: .NET Framework 3.5.
Discussions