(Created page with "{{DISPLAYTITLE:MariaDB on Windows}} __TOC__ {{Hint|file=icon_required.png|text=BlueSpice stores your content in a database for which you need to install a corresponding serv...") |
No edit summary Tag: 2017 source edit |
||
| Line 82: | Line 82: | ||
'''Close''' <span style="color: rgb(37, 37, 37)">all newly opened windows one after the other by clicking "OK".</span> | '''Close''' <span style="color: rgb(37, 37, 37)">all newly opened windows one after the other by clicking "OK".</span> | ||
==Next step== | ==Next step== | ||
If you have successfully completed all of the above steps, proceed to the next step: | If you have successfully completed all of the above steps, proceed to the next step: [[Setup:Installation_Guide/System_Preparation/Windows/OpenJDK|OpenJDK]] | ||
[[en:{{FULLPAGENAME}}]] | [[en:{{FULLPAGENAME}}]] | ||
[[de:Setup:Installationsanleitung/Systemvorbereitung/Windows/MariaDB]] | [[de:Setup:Installationsanleitung/Systemvorbereitung/Windows/MariaDB]] | ||
Revision as of 10:30, 11 March 2022
| BlueSpice stores your content in a database for which you need to install a corresponding server. The steps listed here are required. |
 |
Alternatively, you can also use MySQL at this point, but we recommend the MariaDB database server described as below. |
Download
|
The content of this section refers to external sources and is current at the time of writing this documentation. We cannot guarantee how long these sources will remain unchanged. Please let us know if you notice any discrepancies to the information provided here. |
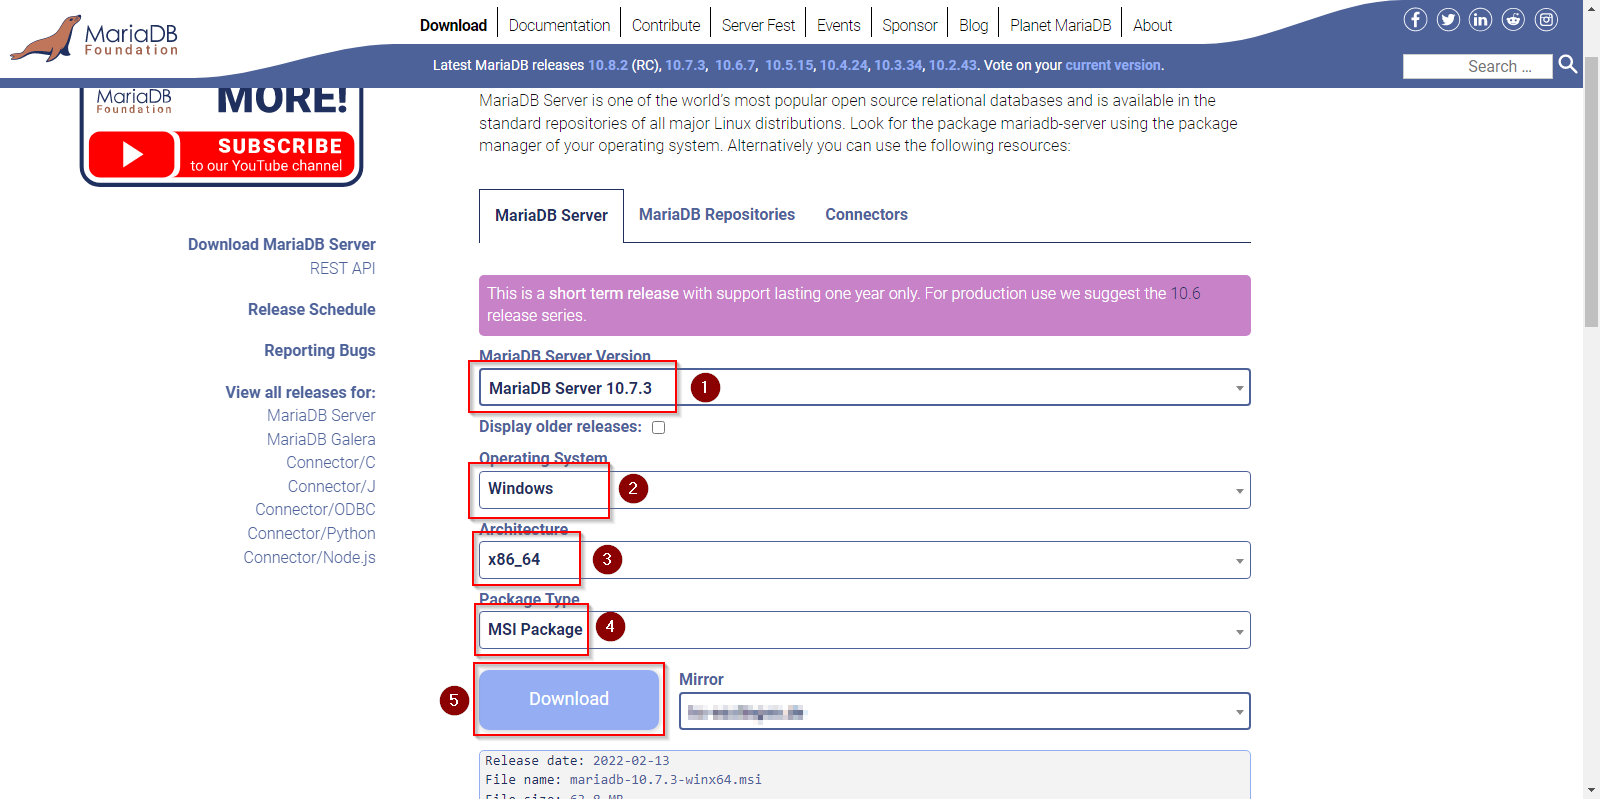
Open the official download page (1) in your browser. If not everything is already filled out correctly, select the latest version of MariaDB (1), the Windows operating system (2), the architecture x86_64 (3) and the MSI package (4).
Click on "Download" (5) and follow the further download instructions.
|
Im Folgenden wird die MariaDB-Version 10.7.3 verwendet und dient nur beispielhaft für die aktuellste Version 10.7.x, die Sie zum Zeitpunkt Ihrer Installation herunterladen können. |
Installation
Öffnen Sie die soeben heruntergeladene MSI-Datei.
Starten Sie die Installation durch Klick auf "Next":

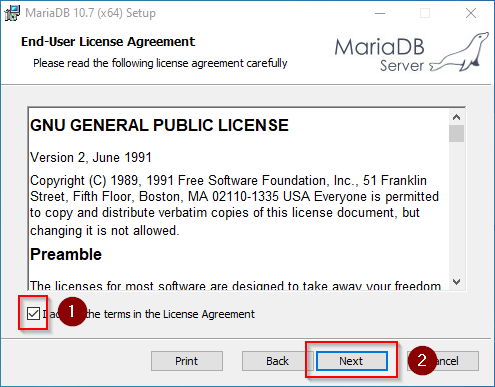
Bestätigen Sie die Lizenzvereinbarung (1) und klicken Sie auf "Next" (2):
Den nächsten Schritt bestätigen Sie durch Klick auf "Next":

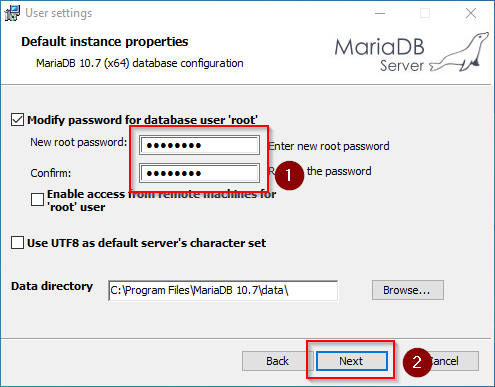
Vergeben Sie ein Kennwort für den administrativen User ("root") des Datenbankservers (1) und klicken Sie auf "Next" (2):
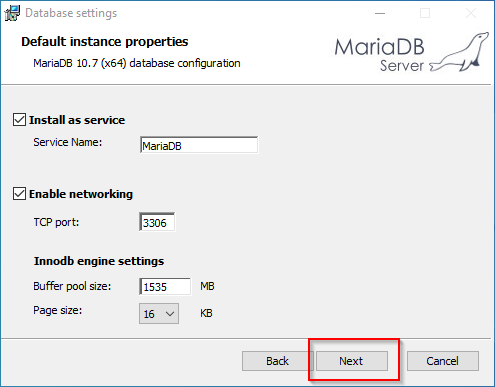
Den nächsten Schritt bestätigen Sie durch Klick auf "Next":
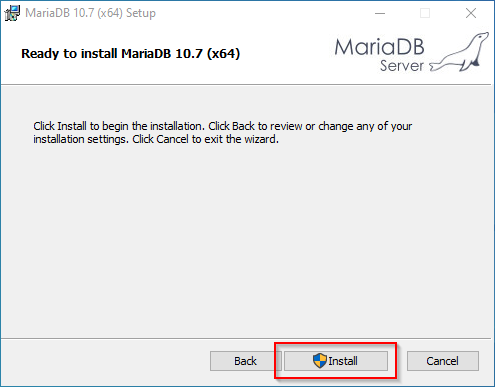
Starten Sie nun die Installation:
Nach Abschluss der Installation beenden Sie den Installer:

Umgebungsvariable setzen
Um MariaDB problemlos auf der Kommandozeile von Windows nutzen zu können, ist es nötig, eine Umgebungsvariable in Windows zu konfigurieren. Führen Sie hierzu folgende Schritte durch:
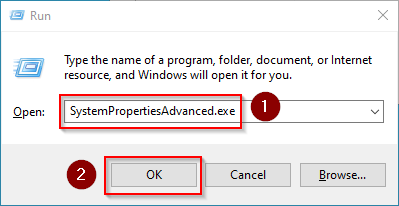
Enter the key combination Windows+R.
Enter "SystemPropertiesAdvanced.exe" (1) in the dialog window and click "OK" (2):
Click "Environment Variables...":

Double-click the entry "Path" in the section "System variables":

Click "New":

Add the path to your MariaDB installation, which includes among otehrs the file mysql.exe. By default, this is the path C:\Program Files\MariaDB 10.7\bin

Close all newly opened windows one after the other by clicking "OK".
Next step
If you have successfully completed all of the above steps, proceed to the next step: OpenJDK
Discussions