| Apache Tomcat is required for the PDF export. The following steps are optional and only required if you want to use this service in your BlueSpice installation. |
 |
Operation of Apache Tomcat requires OpenJDK. If you have not installed it, follow the link above. |
Download
Open the official download page (1) in your browser and go to the version 10 (2) download page.

Download the "32-bit/64-bit Windows Service Installer"

| Please note that the download on your Windows server with Internet Explorer only works if you have configured the Internet Explorer Advanced Security Settings in the Server Manager. Please refer to the technical documentation from Microsoft. |
|
This guide uses version 9.0.16 of Apache Tomcat and is just an example of the latest version that you can download at the time of installation. |
Installing Apache Tomcat
Open the downloaded file "apache-tomcat-10.0.12.exe".
Start the installation by clicking "Next >":

Confirm the license agreement by clicking "I Agree":
Click "Next >":

Click "Next >" again:

Select (1) the home directory of your OpenJDK Installation (2) and click "Next>" (3):

Start the Tomcat Installation:

At the end of the installation, leave both preselected checkboxes (1) and finish the setup (2)

Configuring Apache Tomcat
Change to the installation directory of Tomcat. By default, you can find it at C:\Program Files\Apache Software Foundation\Tomcat 9.0\conf.
Open the context.xml file in a text editor and replace the one-time line
<Context>
with
<Context mapperContextRootRedirectEnabled="true">
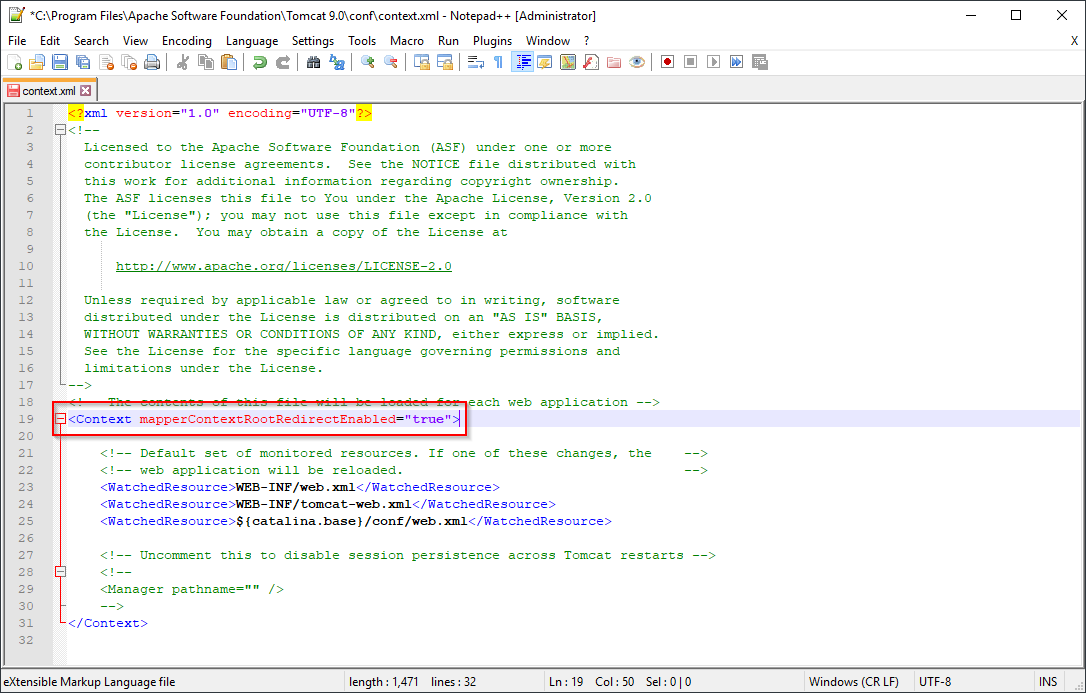
Save and close the file.
In the same directory, open the file server.xml in a text editor and make sure that the complete block
<Connector port="8080" protocol="HTTP/1.1"
	... />
looks like this:
<Connector port="8080" protocol="HTTP/1.1"
	connectionTimeout="20000"
	URIEncoding="UTF-8"
	redirectPort="8443"
	address="127.0.0.1" />
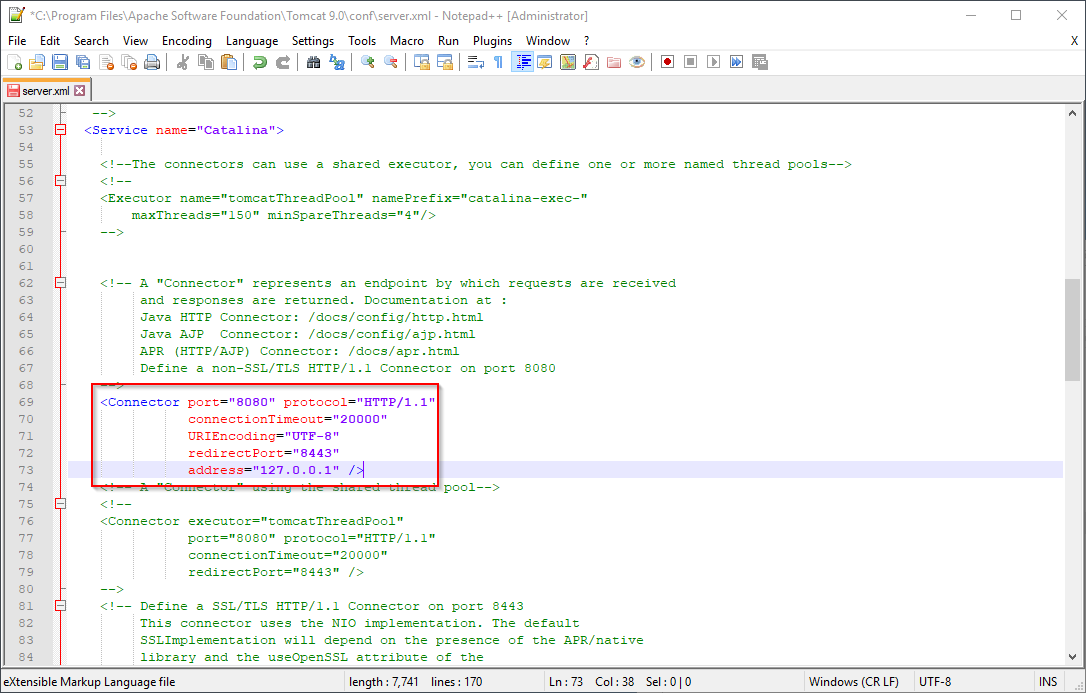
Save and close the file.
Find the entry "Configure Tomcat" in the start menu and open it:

Set "Startup type" to "Automatic" (1) and start Tomcat (2). Then exit the configuration console (3):

Reviewing the installation
To check if Tomcat is working correctly, open the address http://localhost:8080/ in a browser on the server.
You should now see the homepage of the Tomcat server:

Installing the web apps
| [[File:{{{file}}}|center]] | Please unzip the installed BlueSpice folder and move the subfolder to C:\bluespice\var\www. Rename the folder to "w". |
After the successful installation of BlueSpice, please follow the next steps to install the web services and activate the respective BlueSpice extension:
Next step
If you have completed all steps successfully, you can delete the previously downloaded "apache-tomcat-10.0.11.exe" file from your hard drive and continue to the next step " Elasticsearch".
Discussions