(Difference between pages)
(Created page with "The '''Forms''' extension allows formatting a wiki page or a user dialog as a form. It is also used in conjunction with the Workflows extension where i...") |
(Created page with "<div class="downloadarea"> <span class="getButton">Download</span> 450x450px|link=Special:FilePath/banner-example.png </di...") Tag: 2017 source edit |
||
| Line 1: | Line 1: | ||
<div class="downloadarea"> | |||
<span class="getButton">[[Media:HW-banner.zip|Download]]</span> | |||
= | [[File:banner-example.png|450x450px|link=Special:FilePath/banner-example.png]] | ||
</div>This template creates a page banner that you can include on portal pages, for example. You can see an example here in the Helpdesk on the page [[Community]]. | |||
==Importing the template== | |||
The import file is included in the archive file ''HW-banner.zip''. Unpack the zip file first. | |||
# ''' | On the page ''Special:Import'' follow these steps: | ||
# ''' | #'''Select file''' and choose ''HW-banner.xml''. | ||
#'''Enter''' an Interwiki prefix. Since this field is required, simply add ''hw'' (for hallowelt). | |||
#'''Keep''' the selection ''Import to default locations''. | |||
#'''Click''' ''Upload file...'' | |||
The template is now available in your wiki. | |||
==Pages included in the import== | |||
The xml import creates the following files in your wiki: | |||
*Template:Banner | |||
*Template:Banner/styles.css | |||
== | ==Creating a banner== | ||
# '' | #From the Visual Editor ''Insert > Template'' menu, add the template "Banner". <br />[[File:Template Banner step4.png|thumb|link=https://en.wiki.bluespice.com/wiki/File:Template_Banner_step4.png|center|519x519px|Inserting the template through VisualEditor]] | ||
#Click on the inserted template to view the available parameters for formatting the look of the banner.<br /> | |||
= | [[File:Template Banner step5.png|thumb|center|450x450px|Available banner settings|link=Special:FilePath/Template_Banner_step5.png]] | ||
{{Messagebox|boxtype=important|Note text=The settings only take effect after you save the page if you have just inserted the banner template on your page.}} | |||
All settings for the banner are optional. This means that a box can be generated without image, heading, or text. | |||
=== | ==Example settings== | ||
[[File:hw-banner-vorlage.png|center|thumb|650x650px|Banner settings|link=Special:FilePath/hw-banner-vorlage.png]] | |||
{| class="wikitable" style="width:950px;" | |||
|+ style="box-sizing: inherit; padding-top: 8px; padding-bottom: 8px; color: rgb(119, 119, 119); text-align: left; font-weight: bold;" | | |||
! style="background-color:rgb(234, 236, 240);text-align:center;box-sizing:inherit;padding:0.2em 0.4em;border:1px solid rgb(162, 169, 177);" | | |||
! style="background-color:rgb(234, 236, 240);text-align:center;width:200px;box-sizing:inherit;padding:0.2em 0.4em;border:1px solid rgb(162, 169, 177);" |Element | |||
! style="background-color:rgb(234, 236, 240);text-align:center;box-sizing:inherit;padding:0.2em 0.4em;border:1px solid rgb(162, 169, 177);" |Value | |||
! style="background-color:rgb(234, 236, 240);text-align:center;box-sizing:inherit;padding:0.2em 0.4em;border:1px solid rgb(162, 169, 177);" |Description | |||
border- | |- style="box-sizing: inherit;" | ||
| rowspan="3" style="box-sizing:inherit;padding:0.2em 0.4em;border:1px solid rgb(162, 169, 177);" |1 | |||
| style="width:200px;box-sizing:inherit;padding:0.2em 0.4em;border:1px solid rgb(162, 169, 177);" |Banner image | |||
| style="box-sizing:inherit;padding:0.2em 0.4em;border:1px solid rgb(162, 169, 177);" |QM:Flower_white.jpg | |||
| style="box-sizing:inherit;padding:0.2em 0.4em;border:1px solid rgb(162, 169, 177);" |Image name (with namespace prefix, if it exists, but without the ''File:'' prefix). The banner image is optional. | |||
=== | |- style="box-sizing: inherit;" | ||
| style="width:200px;box-sizing:inherit;padding:0.2em 0.4em;border:1px solid rgb(162, 169, 177);" |Image width | |||
| style="box-sizing:inherit;padding:0.2em 0.4em;border:1px solid rgb(162, 169, 177);" |200 | |||
| style="box-sizing:inherit;padding:0.2em 0.4em;border:1px solid rgb(162, 169, 177);" |Number. The width will automatically be used as pixel-value. Default value: ''200'' | |||
border- | |- style="box-sizing: inherit;" | ||
</ | | style="width:200px;box-sizing:inherit;padding:0.2em 0.4em;border:1px solid rgb(162, 169, 177);" |Image alignment | ||
| style="box-sizing:inherit;padding:0.2em 0.4em;border:1px solid rgb(162, 169, 177);" |left, right | |||
| style="box-sizing:inherit;padding:0.2em 0.4em;border:1px solid rgb(162, 169, 177);" |Shows the imag to the left or right. Default value: ''left''. | |||
|- style="box-sizing: inherit;" | |||
| rowspan="3" style="box-sizing:inherit;padding:0.2em 0.4em;border:1px solid rgb(162, 169, 177);" |2 | |||
| style="width:200px;box-sizing:inherit;padding:0.2em 0.4em;border:1px solid rgb(162, 169, 177);" |Heading | |||
| style="box-sizing:inherit;padding:0.2em 0.4em;border:1px solid rgb(162, 169, 177);" |Meine Überschrift | |||
| style="box-sizing:inherit;padding:0.2em 0.4em;border:1px solid rgb(162, 169, 177);" |Heading text | |||
|- style="box-sizing: inherit;" | |||
| style="width:200px;box-sizing:inherit;padding:0.2em 0.4em;border:1px solid rgb(162, 169, 177);" |Heading size | |||
| style="box-sizing:inherit;padding:0.2em 0.4em;border:1px solid rgb(162, 169, 177);" |1.6em | |||
| style="box-sizing:inherit;padding:0.2em 0.4em;border:1px solid rgb(162, 169, 177);" |Size can also be entered as 16px or any other css size value. Default value: ''1.6em''. | |||
|- style="box-sizing: inherit;" | |||
| style="width:200px;box-sizing:inherit;padding:0.2em 0.4em;border:1px solid rgb(162, 169, 177);" |Heading color | |||
| style="box-sizing:inherit;padding:0.2em 0.4em;border:1px solid rgb(162, 169, 177);" |#444444 | |||
| style="box-sizing:inherit;padding:0.2em 0.4em;border:1px solid rgb(162, 169, 177);" |Color as [https://www.w3schools.com/colors/colors_picker.asp hex value]. | |||
|- style="box-sizing: inherit;" | |||
| rowspan="3" style="box-sizing:inherit;padding:0.2em 0.4em;border:1px solid rgb(162, 169, 177);" |3 | |||
| style="width:200px;box-sizing:inherit;padding:0.2em 0.4em;border:1px solid rgb(162, 169, 177);" |Text | |||
| style="box-sizing:inherit;padding:0.2em 0.4em;border:1px solid rgb(162, 169, 177);" |Das ist der Inhalt. | |||
| style="box-sizing:inherit;padding:0.2em 0.4em;border:1px solid rgb(162, 169, 177);" |Text of the box. | |||
|- style="box-sizing: inherit;" | |||
| style="width:200px;box-sizing:inherit;padding:0.2em 0.4em;border:1px solid rgb(162, 169, 177);" |Text size | |||
| style="box-sizing:inherit;padding:0.2em 0.4em;border:1px solid rgb(162, 169, 177);" |1.2em | |||
| style="box-sizing:inherit;padding:0.2em 0.4em;border:1px solid rgb(162, 169, 177);" |''see Heading size'' | |||
|- style="box-sizing: inherit;" | |||
| style="width:200px;box-sizing:inherit;padding:0.2em 0.4em;border:1px solid rgb(162, 169, 177);" |Text color | |||
| style="box-sizing:inherit;padding:0.2em 0.4em;border:1px solid rgb(162, 169, 177);" |#444444 | |||
| style="box-sizing:inherit;padding:0.2em 0.4em;border:1px solid rgb(162, 169, 177);" |''see Heading color'' | |||
|- style="box-sizing: inherit;" | |||
| style="box-sizing:inherit;padding:0.2em 0.4em;border:1px solid rgb(162, 169, 177);" |4 | |||
| style="width:200px;box-sizing:inherit;padding:0.2em 0.4em;border:1px solid rgb(162, 169, 177);" |Content padding | |||
| style="box-sizing:inherit;padding:0.2em 0.4em;border:1px solid rgb(162, 169, 177);" |20px | |||
| style="box-sizing:inherit;padding:0.2em 0.4em;border:1px solid rgb(162, 169, 177);" |Distance of the title/text area to the box and the image. Default value:''10px.'' | |||
|- style="box-sizing: inherit;" | |||
| style="box-sizing:inherit;padding:0.2em 0.4em;border:1px solid rgb(162, 169, 177);" |5 | |||
| style="width:200px;box-sizing:inherit;padding:0.2em 0.4em;border:1px solid rgb(162, 169, 177);" |Padding of the container box | |||
| style="box-sizing:inherit;padding:0.2em 0.4em;border:1px solid rgb(162, 169, 177);" |10px | |||
| style="box-sizing:inherit;padding:0.2em 0.4em;border:1px solid rgb(162, 169, 177);" |Padding of the box itself. Default value: ''0.'' | |||
|- style="box-sizing: inherit;" | |||
| style="box-sizing:inherit;padding:0.2em 0.4em;border:1px solid rgb(162, 169, 177);" |6 | |||
| style="width:200px;box-sizing:inherit;padding:0.2em 0.4em;border:1px solid rgb(162, 169, 177);" |Background color | |||
| style="box-sizing:inherit;padding:0.2em 0.4em;border:1px solid rgb(162, 169, 177);" |#efefef | |||
| style="box-sizing:inherit;padding:0.2em 0.4em;border:1px solid rgb(162, 169, 177);" |<span>Color as</span> [https://www.w3schools.com/colors/colors_picker.asp hex value] <span>. Default value</span> ''#efefef'' (a light grey) | |||
|} | |||
<br /> | |||
__NOTOC__ | |||
Revision as of 11:03, 12 April 2022
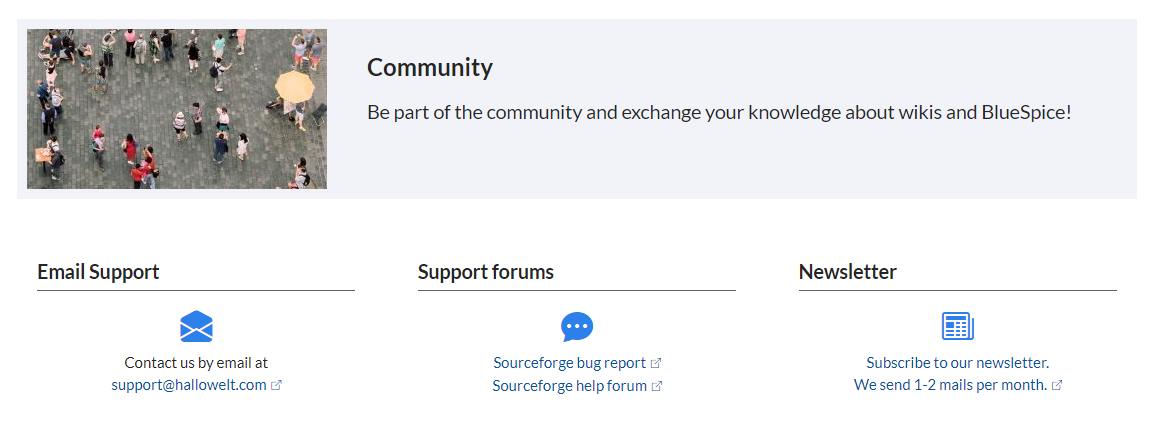
This template creates a page banner that you can include on portal pages, for example. You can see an example here in the Helpdesk on the page Community.
Importing the template
The import file is included in the archive file HW-banner.zip. Unpack the zip file first.
On the page Special:Import follow these steps:
- Select file and choose HW-banner.xml.
- Enter an Interwiki prefix. Since this field is required, simply add hw (for hallowelt).
- Keep the selection Import to default locations.
- Click Upload file...
The template is now available in your wiki.
Pages included in the import
The xml import creates the following files in your wiki:
- Template:Banner
- Template:Banner/styles.css
Creating a banner
- From the Visual Editor Insert > Template menu, add the template "Banner". File:Template Banner step4.pngInserting the template through VisualEditor
- Click on the inserted template to view the available parameters for formatting the look of the banner.
File:Template Banner step5.png
Available banner settings
All settings for the banner are optional. This means that a box can be generated without image, heading, or text.
Example settings

| Element | Value | Description | |
|---|---|---|---|
| 1 | Banner image | QM:Flower_white.jpg | Image name (with namespace prefix, if it exists, but without the File: prefix). The banner image is optional. |
| Image width | 200 | Number. The width will automatically be used as pixel-value. Default value: 200 | |
| Image alignment | left, right | Shows the imag to the left or right. Default value: left. | |
| 2 | Heading | Meine Überschrift | Heading text |
| Heading size | 1.6em | Size can also be entered as 16px or any other css size value. Default value: 1.6em. | |
| Heading color | #444444 | Color as hex value. | |
| 3 | Text | Das ist der Inhalt. | Text of the box. |
| Text size | 1.2em | see Heading size | |
| Text color | #444444 | see Heading color | |
| 4 | Content padding | 20px | Distance of the title/text area to the box and the image. Default value:10px. |
| 5 | Padding of the container box | 10px | Padding of the box itself. Default value: 0. |
| 6 | Background color | #efefef | Color as hex value . Default value #efefef (a light grey) |
Discussions