No edit summary |
No edit summary |
||
| Line 1: | Line 1: | ||
<bookshelf src="Book:User manual" /> | <bookshelf src="Book:User manual" /> | ||
{{DISPLAYTITLE: Insert | {{DISPLAYTITLE:Insert tables}} | ||
==Insert a table== | |||
In VisualEditor, choose "Insert > Tables" to insert a table in a page: | |||
[[File:Instert, Table.png|260x260px]] | |||
[[File: | |||
After entering the rows and columns, an empty table appears with the edit menu: | |||
[[File:table 1.0.png|305x305px]] | |||
When the mouse rests on a symbol, the respective function is displayed. | |||
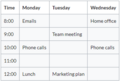
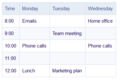
Double-click in the cells to insert text: | |||
[[File:weekly.png|280x280px]] | |||
==Merge rows and columns== | |||
When you click in a row, an arrow appears at the left edge of the row and at the top of the column. To connect the cells in a row or a column, click on the respective arrow and then in the edit menu on "Merge": | |||
[[File:table 3.0.png|300x300px]] | |||
[[File: | |||
=== | You can also connect individual cells. Hold down the Shift key and click in two or more adjacent cells. Then connect the cells. The cells must be adjacent in a row or in a column so that they can be connected. | ||
<span /><br /> | |||
In the | ==Table properties== | ||
In the menu item Properties, there are numerous settings to adjust the functionality and presentation of the table: | |||
{| class="contenttable-blue content table-blue" style="" | |||
!Property | |||
! | |||
!Description | !Description | ||
|- | |- | ||
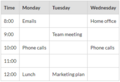
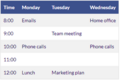
| | |Caption | ||
|[[File: | |Shows a header above the table: | ||
[[File:weeklyplan.png|200x200px]] | |||
After disabling the header, it is lost and must be reentered when re-enabled. | |||
|- | |||
|Styed(wikitable) | |||
|enables the default wiki look after table styles were previously selected | |||
|- | |||
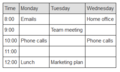
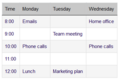
|Sortable | |||
|In the first row, a sort function is displayed: | |||
[[File:Weeklyplan 2.0.png|200x200px]] | |||
The current sorting is shown in the title bar. Only one of the two sort arrows will appear in the sorted column. | |||
|- | |||
|Collapsible | |||
|The table can be hidden on the page via a text link. | |||
|- | |||
|Collapsed initially | |||
|If the "Collapsible" property is active, this determines whether the table is visible or hidden when the wiki page is loaded. T | |||
|- | |||
|Exportable | |||
| | |||
|- | |- | ||
| | |Filterable | ||
|The filter function is activated in the title bar and allows the following actions: | |||
|The | |||
*Sort table (ascending or descending values of the active column) | |||
*Hide table columns | |||
*Filter column (only values from the current column are considered here) | |||
[[File:table 4.0.png|550x550px]] | |||
<span><br /></span> | |||
If the filter is activated, the table styles are ignored and the table is displayed in "Filter Style". After deactivating this function, the selected table style is displayed again. | |||
|- | |- | ||
| | |Table style | ||
| | |Here you can load different style sheets for the table. | ||
|- | |- | ||
| | |Use full width for table | ||
|The table uses the full width of the wiki page, regardless of the table contents. | |||
|The | |} | ||
==Table styles== | |||
<span><br /></span> | |||
The following style sheets can be selected in the Table Style menu. Click on a picture to start the gallery: | |||
<span /><br /><gallery> | |||
File:Gallery 1.0.png|Standard | |||
File:Gallery 2.0.png|Content | |||
File:Gallery 3.0.png|Content (black) | |||
File:Gallery 4.0.png|Content (blue) | |||
File:Gallery 5.0.png|Content (darkblue) | |||
File:Gallery 6.0.png|Cusco Sky | |||
File:Gallery 7.0.png|Casablanca | |||
File:Gallery 8.0.png|Greyscale | |||
File:Gallery 9.0.png|Greyscale (narrow) | |||
</gallery> | |||
<span><br /></span> | |||
<section begin="training-tabellen" /><div class="training anwender"> | |||
The visual editor makes it easy to format content as a table. The following alternatives for creating tables exist: | |||
* Tables can also be inserted as a csv file on a page (just drag the CSV file onto the page in edit mode) | |||
* Complex tables can alternatively be attached to the page as an xlsx file. | |||
{{Box Links-en|Topic1=[[Manual:Extension/BlueSpiceFilterableTables|Filterable tables]]}}</div><section end="training-tabellen" /> | |||
<span><br /></span> | |||
[[en:{{FULLPAGENAME}}]] | [[en:{{FULLPAGENAME}}]] | ||
[[de:VisualEditor/ | [[de:VisualEditor/Tabellen]] | ||
Revision as of 17:14, 22 November 2022
Insert a table
In VisualEditor, choose "Insert > Tables" to insert a table in a page:

After entering the rows and columns, an empty table appears with the edit menu:

When the mouse rests on a symbol, the respective function is displayed.
Double-click in the cells to insert text:

Merge rows and columns
When you click in a row, an arrow appears at the left edge of the row and at the top of the column. To connect the cells in a row or a column, click on the respective arrow and then in the edit menu on "Merge":

You can also connect individual cells. Hold down the Shift key and click in two or more adjacent cells. Then connect the cells. The cells must be adjacent in a row or in a column so that they can be connected.
Table properties
In the menu item Properties, there are numerous settings to adjust the functionality and presentation of the table:
| Property | Description |
|---|---|
| Caption | Shows a header above the table:
After disabling the header, it is lost and must be reentered when re-enabled. |
| Styed(wikitable) | enables the default wiki look after table styles were previously selected |
| Sortable | In the first row, a sort function is displayed:
The current sorting is shown in the title bar. Only one of the two sort arrows will appear in the sorted column. |
| Collapsible | The table can be hidden on the page via a text link. |
| Collapsed initially | If the "Collapsible" property is active, this determines whether the table is visible or hidden when the wiki page is loaded. T |
| Exportable | |
| Filterable | The filter function is activated in the title bar and allows the following actions:
|
| Table style | Here you can load different style sheets for the table. |
| Use full width for table | The table uses the full width of the wiki page, regardless of the table contents. |


Table styles
The following style sheets can be selected in the Table Style menu. Click on a picture to start the gallery:
Standard
Content
Content (black)

Content (blue)
Content (darkblue)
Cusco Sky
Casablanca

Greyscale
Greyscale (narrow)


The visual editor makes it easy to format content as a table. The following alternatives for creating tables exist:
- Tables can also be inserted as a csv file on a page (just drag the CSV file onto the page in edit mode)
- Complex tables can alternatively be attached to the page as an xlsx file.
Related info
Discussions