Created page with "{{Messagebox|boxtype=Note|icon=|Note text=This template requires the extension [https://www.mediawiki.org/wiki/Extension:Widgets Widgets]. It is already bundled with BlueSpice..." Tag: 2017 source edit |
No edit summary Tag: 2017 source edit |
||
| Line 1: | Line 1: | ||
{{Messagebox|boxtype= | {{Messagebox|boxtype=note|icon=|Note text=This template requires the extension [https://www.mediawiki.org/wiki/Extension:Widgets Widgets]. It is already bundled with BlueSpice pro, but not with BlueSpice free.|bgcolor=}} | ||
<div class="downloadarea"> | <div class="downloadarea"> | ||
<span class="getButton">[[Media:HW-svg.zip|Download]]</span> | <span class="getButton">[[Media:HW-svg.zip|Download]]</span> | ||
Revision as of 09:56, 3 March 2022
With this template users can embed an interactive SVG on a wiki page. The SVG file has to be uploaded to the wiki first.
Importing the template
The import file is included in the archive file HW-svg.zip. Unpack the zip file first.
On the page Special:Import, follow these steps:
- Select file and choose HW-svg.xml.
- Enter an interwiki prefix. Since this field is required, simply add hw (for hallowelt).
- Keep the selection Import to default locations.
- Click Upload file... .
The template is now available in your wiki.
Pages included in the import
The xml import creates the following files in your wiki:
- Template:Svg
- Widget:Svg
Using the template
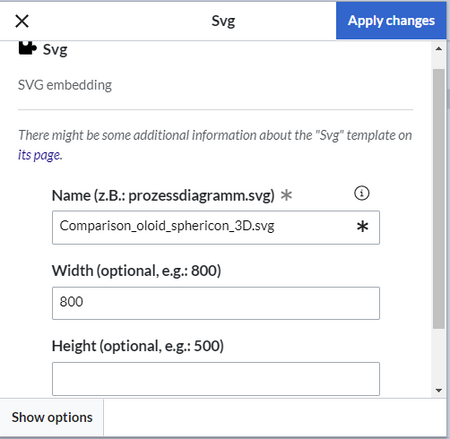
- Select Insert > Template from the visual editor menu.
- Select the template Svg.
- Enter the file name of the SVG file. If the file is associated with a namespace, don't forget to provide the namespace prefix. (E.g.:
QM:Orgchart.svg). The file needs to already exist in your wiki. - Click "Save changes".

